Monthly Archives: January 2015

Homemade Barbecue Sauce or The Headcheese That Never Was

Homemade Barbecue Sauce

So my new thing for January was to make  head cheese, definitely something I have never tried before and out of my comfort zone.

I purchased a piglet last summer and paid monthly for the farm to raise it, (pastured on non-GMO  Montana raised grains and fresh raw milk).  When it was time to butcher it, I got to choose my cuts, and as I am trying to be a nose to tail eater, I had them include the head.

Head cheese actually has nothing to do with cheese.  You basically boil the whole head,  pick  the meat off of it, reduce the broth, and pour it over the layered meat to make a pig head meat Jello, YUM right?  Check out the recipes for head cheese HERE and HERE.

Well I boiled the head, much to the complaining of my family and I picked the meat off, but as I pondered the head cheese, I realized I would be the only person eating it.  One can only eat so much head cheese.

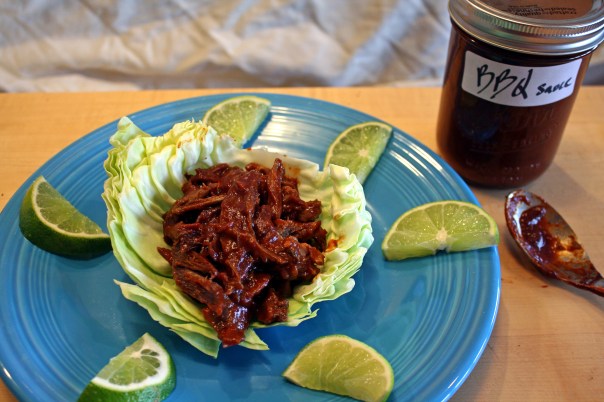
The meat is actually quite tasty, so I decided to make some barbecue sauce and go a pulled pork route instead.  I continued to reduce the broth and made a homemade bouillon that I can use in sauces and soups.  I followed the recipe HERE for homemade bouillon.

So even if I didn’t actually make and eat the  head cheese, I did take the steps to do it and learned a few things along the way.  Here’s to trying new things!!!!


Homemade barbecue Sauce (a KLee original)

1 Can of organic tomato sauce ( I use Miur Glen)

1 Cup Water

1/2 Cup Apple Cider Vinegar (I use Braggs)

3 TBL Blackstrap Molasses

2 TBL Honey

1 TBL Dijon Mustard

2 tsp. Liquid smoke (optional)

1/2 TBL Onion Powder

1/2 tsp. Freshly Ground Black Pepper

1-2 Pureed Chipotle Peppers in Adobo Sauce (just depends on how spicy you want it)

  1. Place all ingredients into a non reactive sauce pan. mix well and bring to a boil
  2. Reduce the heat and simmer until the sauce is reduced by about 1/3 (so it is thick enough to stick to the back of a spoon).
  3. Adjust your seasonings to taste
  4.  Store in a glass container in the refrigerator. Enjoy!

Good For You Gelatin Gummies


Gelatin Gummies
Gelatin Gummies

Today I am posting a recipe for gelatin gummies.  I don’t know about you, but real gummies I find to be very frustrating to chew.  They are so bouncy and resistant that I lose interest in chewing them after a while.  Like a piece of tough steak, I just want to move on already and digest the thing!  Not to mention they are not very good for the teeth or body.

These gummies are more like thick jello with really good flavor, health benefits, and just the right amount of bounce.

A good source of gelatin from grass fed pastured animals yields many health benefits for you.  I use this BRAND,  the red can is the kind that sets up and gels, the green can does not gel and is good to add to drinks or soups.

Grass Fed Gelatin
Grass Fed Gelatin

Read HERE and HERE about the benefits and uses of gelatin.  Good for skin (think collagen), joints, gut, weight loss, cellulite, hormones to name a few.  And it’s just plain fun.  Be sure to use a good brand of gelatin for maximum health benefits!


This recipe is a template that you can add different flavors to.  It is an adaptation from several recipes I found on the internet, it is by no means a KLee original.

Gelatin Gummies

1 1/2 cups of pure Fruit Juice (tart cherry, pomegranate, blueberry, whatever your fancy, just not pineapple it prevents the gelatin from setting up)

or

3/4 cup citrus juice and 3/4 cup fruit juice

4 TBL of Gelatin

1-3 TBL Raw Honey or Maple Syrup

  1. Sprinkle the gelatin on 3/4 cup of the cold juice.
  2. Heat 3/4 cup of the juice to boiling.
  3. Add the boiling hot juice to the gelatin and stir in the sweetener of your choice.  This is purely your preference.  Don’t go crazy on the sweet stuff!!
  4. The fun part is you can add all sorts of additional things.  One recipe I found HERE used elderberry syrup and raw honey for cold flu season.   Another HERE used turmeric and fresh grated ginger for additional health benefits.  Add fruit, spices or Herbs, get creative you can’t mess up !!!!
  5. Once it is well mixed pour into a baking dish or loaf pan or into molds.
  6. Let set up in the Refrigerator for 30 minutes or so. I poured some into a loaf pan and made blocks. I also poured some into a glass baking dish and cut them out with a small cookie cutter for the kiddies.
  7. Enjoy!

Parsnips And Happy 2015!!!!

Parsnips
Parsnips

Happy New Year!  So exciting and grateful to face yet another glorious year of endless possibilities.  My resolution this year is to try something new each month, big or small from food to travel to books to sports or a class perhaps.

I recently tried ice climbing and was so surprised how invigorating it was to try something new and totally out of my comfort zone.  I was also surprised at how much I liked it.

So that will be my barometer if it is out of my zone, comfort or otherwise I will try it.  I’ll let you know what it is each month.

On to parsnips they may be new to you or not, but often they get overlooked at the grocery store.  Parsnips are a wonderful taproot vegetable that are very versatile.  For the full skinny on the parsnip read HERE.

Full of vitamins minerals and fiber they are a nice alternative to potatoes.  You can fry, roast, mash, puree or eat them raw.  I have been using them mashed lately as they go well with all types of protein from salmon to roast pork.  Martha Stewart has 21 different recipes for parsnips HERE.  Shake it up a little this winter and eat some parsnips.


Mashed Parsnips

3 Parsnips (good sized) peeled and chopped into 2 inch sections

1/4 cup Butter

Splash of cream

Salt and Pepper to taste

Boil the parsnips until they are soft.  Add the Butter and cream salt and pepper and mash using a hand mixer, a fork or an immersion blender until they are smooth and creamy!  The amounts above are an estimate add more butter or cream if needed.